Monday 29 April 2013

Here are the pictures from a bit later, I'm thinking about having the cockpit a bit closer to the screen...  I'll take a video of it in action in the next couple of days - I'm up to my neck in paperwork at the moment!


It now works as a static simulator!  I'll take some more photos tonight, so you can actually see the screen, but I've mounted my computer joystick inside and gone for a fly!  Unfortunately, the deadline for the A-level is this Wednesday (!), so the hydraulics won't be done by then, but hopefully I can get them fitted by the end of term.


Friday 15 March 2013

I got in and it didn't break!  I've made a couple of locking bars out of 12mm steel rod that are doing a cracking job of preventing it from collapsing.  These fit into two brackets that I've tacked to the plates on each frame.  This does, however, mean that all there is between me and a trip to the hospital is a couple of tack welds!  But that's fine, as I have complete faith in my welding skills (cough).  I spent the lesson today doing a series of photos of the cockpit at the maximum angle in each direction, and measuring the distances between the ram mounting plates.  This will (hopefully!) allow me work out what the max extension of the rams needs to be, so I can think about actually getting some.  Either way, I'm pretty excited to have been in it without it falling apart!


Friday 8 March 2013

Finally, I've managed to put it all together!  Bolting the cockpit onto the frame was a bit of a challenge (read painful!), but attaching it to the base was surprisingly simple.  Seeing as the hydraulics are conspicuous by their absence, I'm going to build a simple locking frame that will ensure it doesn't move when I get in.  Next on the agenda is testing, which is going to involve looking at angles and forces.  I can hardly wait...  :P


Tuesday 26 February 2013


The beast has been assembled!  Minus the actual cockpit, but that's just a minor detail.  I finished drilling the base, then reassemble the UJ.  I then realised that I'd assembled it without the 4 bolts in place, swore profusely, then took it apart and re-did it.  Once that was complete, I had the exciting task of assembling the damn thing without breaking, dropping, scratching or otherwise damaging any of the sections I've spent the last 4 months creating.


Thursday 21 February 2013

Unfortunately the last set of photos are still on the school system, so I can't access them.  I'm sure there's a way, I just can't remember!  Either way, the base frame is now fully drilled and waiting to be countersunk, and the mini-frame that the UJ attaches to has been welded together.  I'm now taking the opportunity to catch up on some paperwork (production diary, gantt chart, etc...) over half term!

Saturday 9 February 2013

Marking out, centre punching and drilling the holes in the cross bars.  These are going to be bolted onto the frame, and the UJ is going to be mounted on top of them.


Thursday 7 February 2013

After a brief wait for some more 50x25 box section (due to the fact that I cut up the wrong bit...) the base is nearing completion!  The two rectangles have been tacked together, and the two long bits (technical term!) will be bolted on.  This mean that I'll be able to disassemble it and hopefully managed to get it through the door.  The UJ then bolts onto the plate, and it should start to look somewhere near its final form.


Tuesday 29 January 2013

The main frame is complete!  After a 3 hour session of careful positioning and welding it's finally assembled, which means I can concentrate on getting the base done - then I might be getting somewhere.  As per usual with any sort of welding, I managed to burn myself (it stays hot for so long!) but this time I managed to melt a hole in it.  I suppose there's a first time for everything!  I also managed to use almost every tool in the workshop, which I'm quite impressed with.


Thursday 24 January 2013

Had a cracking session yesterday!  The UJ has been drilled to allow it to be attached to the base, and I've made the plate that the main frame will attach to.  It's made from two 200mm lengths of 50mm wide steel plate welded together and ground down.  Now I just need to weld the supports to it! (Potentially easier said than done...).  Also, I've decided that I'm not going to be able to get the hydraulics in and sorted by the finish date, so instead I'm going to use a couple of electric actuators to show what movement would be available.  It's not an ideal solution, but at least it will move!


Monday 21 January 2013

Sunday 20 January 2013

Sorry about the break, I've been swamped under a pile of paperwork due to a fairly major redesign I've been pursuing.  To this end, I've now got a new UJ design (which happily is only a simple mod to the one I've already got) and a new frame.  My Blue Peter-esque model isn't the best, but hopefully it gets the idea across.  One cylinder goes straight from the ground to the cockpit, the other from the UJ itself.  This means that they are completely independent which solves the problem of them trying to fight each other whilst in motion.

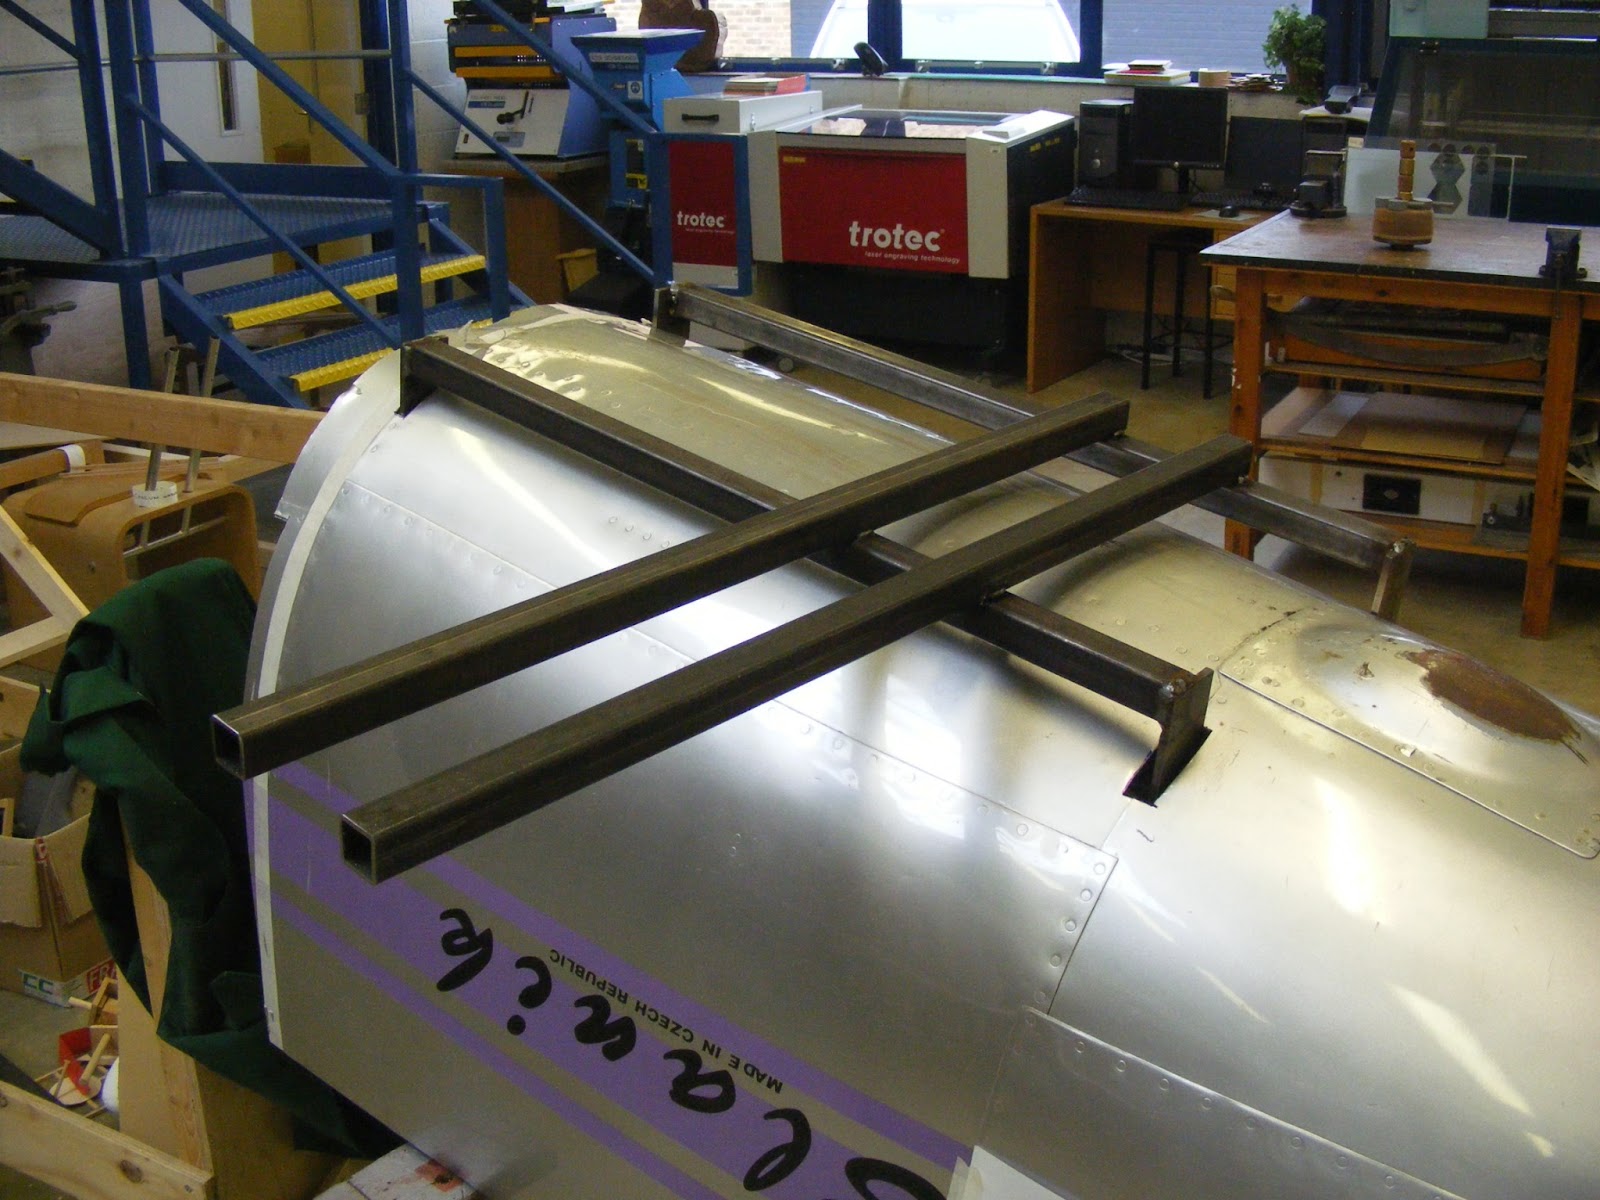
The new frame design (I'll upload some pics tomorrow) now has the UJ on the ground, with supports spreading out from it to the four corners of the frame under the cockpit.  This frame now has a horizontal extension for the roll cylinder to connect to.  

However, there is a minor issue.  To allow sufficient time for testing and evaluation, I now have six (!!!!) weeks to finish the project.  Finito.  Done.  Could be a challenge :P.  Because of this, I'm planning on using a pair of electronic actuators to provide a degree of movement to show what will be possible with hydraulics.

Now that I'm diving head first into the manufacture process I'll be able to keep you updated regularly as the beast slowly nears completion!

More pictures to follow...